This can be seen as a follow-up post of my previous post on building Eclipse p2 composite repositories. In this blog post I’ll show an automatic way for publishing an Eclipse p2 (composite) repository (a.k.a. update site) on Sourceforge, using rsync for synchronization. You may find online many posts about publishing update sites on Github pages and recently on bintray. (as a reminder, rsync is a one-way synchronization tool, and we assume that the master replica is the one on sourceforge; rysnc, being a synchronization tool, will only transfer the changed files during synchronization).
I prefer sourceforge for some reasons:
- you have full and complete access to the files upload system either with a shell or, most importantly for the technique I’ll describe here, with rsync. From what I understand, instead, bintray will manage the binary artifacts for you;
- in order to create and update a p2 composite site you must have access to the current file system layout of the p2 update site, which I seem to understand is not possible with bintray;
- you have download statistics and your artifacts will automatically mirrored in sourceforge’s mirrors.
By the way: you can store your git repository anywhere you want, and publish the binaries on sourceforge. (see this page and this other page).
I’ll reuse the same example of the previous post, the repository found here https://github.com/LorenzoBettini/p2composite-example, where you find all the mechanisms for creating and updating a p2 composite repository.
The steps of the technique I’ll describe here can be summarized as follows: when it comes to release a new child in the p2 composite update site (possibly already published on Sourceforge), the following steps are performed during the Maven/Tycho build
- Use rsync to get an update local version of the published p2 composite repository somewhere in your file system (this includes the case when you never released a version, so you’ll get a local empty directory)
- Build the p2 repository with Tycho
- Add the above created p2 repository as a new child in the local p2 composite repository (this includes the case where you create a new composite repository, since that’s your first release)
- Use rsync to commit the changes back to the remote p2 composite repository
Since we use rsync, we have many opportunities:
- we’re allowed to manually modify (i.e., from outside the build infrastructure) the p2 composite repository, for instance by removing a child repository containing a wrong release, and commit the changes back;
- we can release from any machine, notably from Jenkins or Hudson, since we always make sure to have a synchronized local version of the released p2 composite repository.
Prepare the directory on Sourceforge
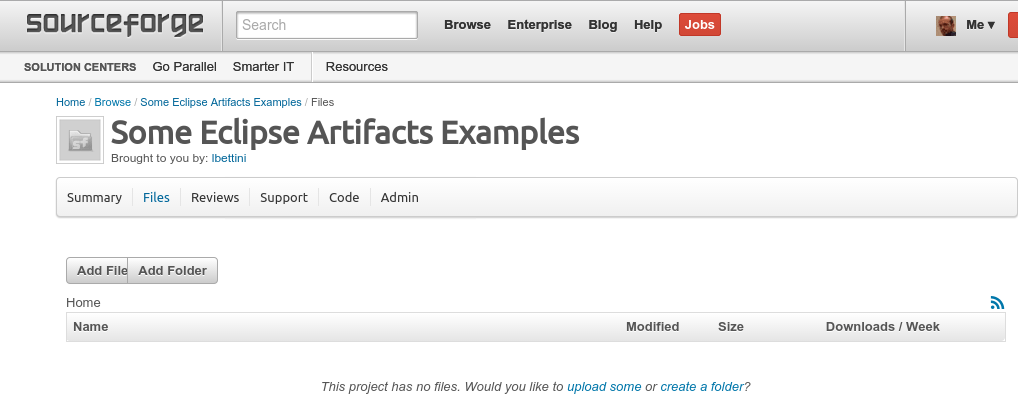
This assumes that you have an account on Sourceforge, that you have registered a project. You need to create the directory that will host your p2 composite repository in the “Files” section.
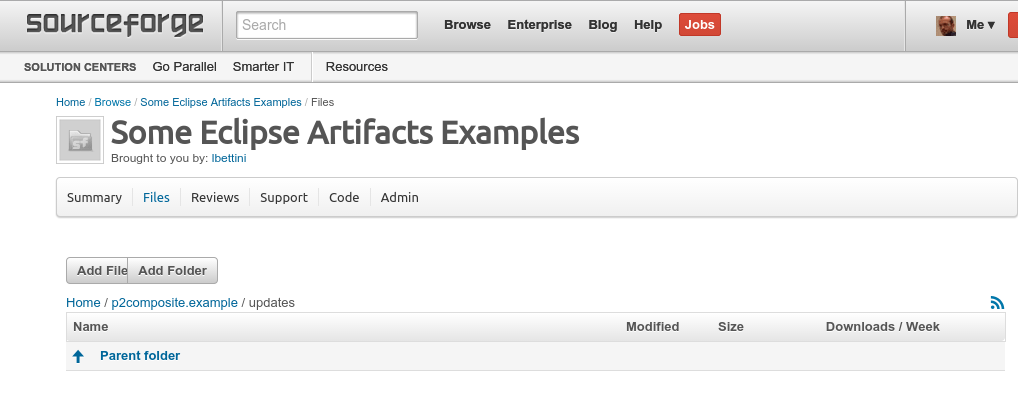
For this example I created a new project eclipseexamples, https://sourceforge.net/projects/eclipseexamples/, and I plan to store the p2 composite in the sourceforge file system on this path: p2composite.example/updates.
So I’ll create the directory structure accordingly (using the “Add Folder” button:

Ant script for rsync
I’m using an ant script since it’s easy to call that from Maven, and also manually from the command line. This assumes that you have already rsync installed on your machine (or in the CI server from where you plan to perform releases).
This ant file is meant to be completely reusable.
Here’s the ant file
|
1 2 3 4 5 6 7 8 9 10 11 12 13 14 15 16 17 18 19 20 21 22 23 24 25 26 27 28 29 30 31 32 33 34 35 36 37 38 39 40 41 42 43 44 45 46 47 48 49 50 51 52 53 54 55 56 |
<?xml version="1.0" encoding="UTF-8"?> <project name="Rsync from Ant" basedir="."> <!-- local source directory for rsync (read from this directory) --> <!-- <property name="rsync.remote.dir" value="lbettini,eclipseexamples@frs.sourceforge.net:/home/frs/project/eclipseexamples/p2composite.example/updates/"/> --> <!-- remote rsync host --> <!-- <property name="rsync.local.dir" value="${user.home}/p2.repositories/updates/"/> --> <!-- pass "-n" to perform a trial run with no changes made --> <!-- <property name="dryrun" value="-n"/> --> <target name="rsync-update"> <rsync source="${rsync.remote.dir}" dest="${rsync.local.dir}" /> </target> <target name="rsync-commit"> <rsync source="${rsync.local.dir}" dest="${rsync.remote.dir}" /> </target> <!-- = = = = = = = = = = = = = = = = = macrodef: rsync = = = = = = = = = = = = = = = = = --> <macrodef name="rsync"> <attribute name="source" /> <attribute name="dest" /> <sequential> <echo message="Rsync source:" /> <echo message="@{source}" /> <echo message="Rsync destination:" /> <echo message="@{dest}" /> <exec dir="." executable="rsync"> <arg value="-azvc" /> <!-- exclude all hidden files and directories --> <arg line="--exclude='.*'" /> <!-- use ssh --> <arg line="-e ssh" /> <!-- use ssh --> <arg line="--delete" /> <!-- use ssh --> <arg line="${dryrun}" /> <!-- source for the rsync --> <arg value="@{source}" /> <!-- destination for rsync --> <arg value="@{dest}" /> </exec> </sequential> </macrodef> </project> |
We have a macro for invoking rsync with the desired options (have a look at rsync documentation for understanding their meaning, but it should be straightforward to get an idea).
In particular, the transfer will be done with ssh, so you must have an ssh key pair, and you must have put the public key on your account on sourceforge. Either you created the key pair without a passphrase (e.g., for releasing from a CI server of your own), or you must make sure you have already unlocked the key pair on your local machine (e.g., with an ssh-agent, or with a keyring, depending on your OS).
The arguments source and dest will depend on whether we’re doing an update or a commit (see the two ant targets). If you define the property dryrun as -n then you can simulate the synchronization (both for update and commit); this is important at the beginning to make sure that you synchronize what you really mean to synchronize. Recall that when you perform an update, specifying the wrong local directory might lead to a complete deletion of that directory (the same holds for commit and the remote directory). Moreover, source and destinations URLs in rsync have a different semantics depending on whether they terminate with a slash or not, so make sure you understand them if you need to customize this ant file or to pass special URLs.
The properties rsync.remote.dir and rsync.local.dir will be passed from the Tycho build (or from the command line if you call the ant script directly). Once again, please use the dryrun property until you’re sure that you’re synchronizing the right paths (both local and remote).
Releasing during the Tycho build
Now we just need to call this ant’s targets appropriately from the Tycho build; I’ll do that in the pom.xml of the project that builds and updates the composite p2 repository.
Since I don’t want to push a new release on the remote site on each build, I’ll configure the plugins inside a profile (it’s up to you to decide when to release): here’s the new part:
|
1 2 3 4 5 6 7 8 9 10 11 12 13 14 15 16 17 18 19 20 21 22 23 24 25 26 27 28 29 30 31 32 33 34 35 36 37 38 39 40 41 42 43 44 45 46 47 48 49 50 51 52 53 54 55 56 57 58 |
<profiles> <profile> <id>release-composite</id> <activation> <activeByDefault>false</activeByDefault> </activation> <properties> <!-- local source directory for rsync (read from this directory) --> <rsync.remote.dir>lbettini,eclipseexamples@frs.sourceforge.net:/home/frs/project/eclipseexamples/p2composite.example/updates/</rsync.remote.dir> <!-- remote rsync host --> <rsync.local.dir>${user.home}/p2.repositories/updates/</rsync.local.dir> <!-- pass "-n" to perform a trial run with no changes made --> <dryrun></dryrun> </properties> <build> <plugins> <plugin> <artifactId>maven-antrun-plugin</artifactId> <version>${maven-antrun-plugin.version}</version> <executions> <execution> <id>update-local-repository</id> <phase>prepare-package</phase> <configuration> <target> <ant antfile="${basedir}/rsync.ant" target="rsync-update"> </ant> </target> </configuration> <goals> <goal>run</goal> </goals> </execution> <execution> <id>deploy-repository</id> <phase>verify</phase> <configuration> <target> <ant antfile="${basedir}/rsync.ant" target="rsync-commit"> </ant> </target> </configuration> <goals> <goal>run</goal> </goals> </execution> </executions> </plugin> </plugins> </build> </profile> </profiles> |
Now the URL to access a remote path on sourceforge with ssh has the following shape
<username>,<project>@frs.sourceforge.net:/home/frs/project/<project>/<path>
So in my case I specified (again, the final / is crucial for what we want to synchronize with rsync, see the note above):
lbettini,eclipseexamples@frs.sourceforge.net:/home/frs/project/eclipseexamples/p2composite.example/updates/
The local URL specifies where the local p2 composite site is stored (see the previous post), in this example it defaults to
${user.home}/p2.repositories/updates/
Again, the final / is crucial.
We configured the maven-antrun-plugin with two executions:
- before updating the p2 composite update site (phase prepare-package) we make sure we have a synchronized local version of the repository
- after updating the p2 composite update site (phase verify) we commit the changes to the remote repository
- That’s all 🙂
Let’s try it
Of course, if you want to try it, you need a project on sourceforge and a directory on that project’s Files section (and you’ll have to change the URLs accordingly in the pom file).
To perform a release we need to call the build enabling the profile release-composite, and specify at least verify as goal:
|
1 |
mvn clean verify -Prelease-composite |
Let’s say we still haven’t released anything.
Since the remote directory is empty, in our local file system we’ll simply have the directory created. In the end of the build, the composite site is created and the remote directory will be synchronized with our local contents:
|
1 2 3 4 5 6 7 8 9 10 11 12 13 14 15 16 17 18 19 20 21 22 23 24 25 26 27 28 29 30 31 32 33 34 35 36 37 38 39 40 41 42 43 44 45 46 47 48 49 50 51 52 53 54 55 56 57 58 59 60 61 62 63 64 65 66 67 68 69 70 71 72 73 74 75 76 77 78 79 80 81 82 83 84 85 86 87 88 89 90 91 92 93 94 95 96 97 98 99 100 101 102 103 104 105 106 107 |
[INFO] --- maven-antrun-plugin:1.7:run (update-local-repository) @ p2composite.example.site --- [INFO] Executing tasks main: rsync-update: [echo] Rsync source: [echo] lbettini,eclipseexamples@frs.sourceforge.net:/home/frs/project/eclipseexamples/p2composite.example/updates/ [echo] Rsync destination: [echo] /home/bettini/p2.repositories/updates/ [exec] receiving incremental file list [exec] created directory /home/bettini/p2.repositories/updates [exec] ./ [exec] [exec] sent 35 bytes received 54 bytes 11.87 bytes/sec [exec] total size is 0 speedup is 0.00 [INFO] Executed tasks [INFO] [INFO] --- target-platform-configuration:0.22.0:target-platform (default-target-platform) @ p2composite.example.site --- [INFO] [INFO] --- tycho-p2-publisher-plugin:0.22.0:publish-products (default-publish-products) @ p2composite.example.site --- [INFO] [INFO] --- tycho-p2-publisher-plugin:0.22.0:publish-categories (default-publish-categories) @ p2composite.example.site --- [INFO] [INFO] --- tycho-p2-publisher-plugin:0.22.0:attach-artifacts (default-attach-artifacts) @ p2composite.example.site --- [INFO] [INFO] --- tycho-p2-repository-plugin:0.22.0:assemble-repository (default-assemble-repository) @ p2composite.example.site --- [INFO] [INFO] --- tycho-p2-repository-plugin:0.22.0:archive-repository (default-archive-repository) @ p2composite.example.site --- [INFO] Building zip: /home/bettini/work/eclipse/p2composite/p2composite-example/p2composite.example.site/target/p2composite.example.site-1.0.0-SNAPSHOT.zip [INFO] [INFO] --- tycho-source-feature-plugin:0.22.0:source-feature (source-feature) @ p2composite.example.site --- [INFO] [INFO] --- tycho-p2-plugin:0.22.0:p2-metadata (attach-p2-metadata) @ p2composite.example.site --- [INFO] [INFO] --- maven-antrun-plugin:1.7:run (copy-to-root-target) @ p2composite.example.site --- [INFO] Executing tasks main: [echo] [echo] Repository path: /home/bettini/work/eclipse/p2composite/p2composite-example/p2composite.example.site/target/repository [echo] Built version: 1.0.0.v20150121-1828 [echo] [copy] Copying 6 files to /home/bettini/work/eclipse/p2composite/p2composite-example/target/repository [INFO] Executed tasks [INFO] [INFO] --- tycho-eclipserun-plugin:0.22.0:eclipse-run (add-p2-composite-repository) @ p2composite.example.site --- [INFO] Expected eclipse log file: /home/bettini/work/eclipse/p2composite/p2composite-example/p2composite.example.site/target/eclipserun-work/data/.metadata/.log [INFO] Command line: [/usr/lib/jvm/java-7-oracle/jre/bin/java, -jar, /media/app/.m2/repository/p2/osgi/bundle/org.eclipse.equinox.launcher/1.3.0.v20140415-2008/org.eclipse.equinox.launcher-1.3.0.v20140415-2008.jar, -install, /home/bettini/work/eclipse/p2composite/p2composite-example/p2composite.example.site/target/eclipserun-work, -configuration, /home/bettini/work/eclipse/p2composite/p2composite-example/p2composite.example.site/target/eclipserun-work/configuration, -application, org.eclipse.ant.core.antRunner, -buildfile, packaging-p2composite.ant, p2.composite.add, -Dsite.label=Composite Site Example, -Dproject.build.directory=/home/bettini/work/eclipse/p2composite/p2composite-example/p2composite.example.site/target, -DunqualifiedVersion=1.0.0, -DbuildQualifier=v20150121-1828] Buildfile: packaging-p2composite.ant getMajorMinorVersion: compute.child.repository.data: p2.composite.add: [echo] [echo] Source repository path: /home/bettini/work/eclipse/p2composite/p2composite-example/p2composite.example.site/target/repository [echo] Copying to /home/bettini/p2.repositories/updates/1.0/1.0.0.v20150121-1828/... [mkdir] Created dir: /home/bettini/p2.repositories/updates/1.0/1.0.0.v20150121-1828 [copy] Copying 6 files to /home/bettini/p2.repositories/updates/1.0/1.0.0.v20150121-1828 [echo] [echo] Composite repository : /home/bettini/p2.repositories/updates/1.0 [echo] Composite name : Composite Site Example 1.0 [echo] Adding child repository : 1.0.0.v20150121-1828 [echo] [echo] Composite repository : /home/bettini/p2.repositories/updates [echo] Composite name : Composite Site Example All Versions [echo] Adding child repository : 1.0 BUILD SUCCESSFUL BUILD SUCCESSFUL Total time: 0 seconds [INFO] [INFO] --- maven-antrun-plugin:1.7:run (deploy-repository) @ p2composite.example.site --- [INFO] Executing tasks main: rsync-commit: [echo] Rsync source: [echo] /home/bettini/p2.repositories/updates/ [echo] Rsync destination: [echo] lbettini,eclipseexamples@frs.sourceforge.net:/home/frs/project/eclipseexamples/p2composite.example/updates/ [exec] sending incremental file list [exec] ./ [exec] compositeArtifacts.xml [exec] compositeContent.xml [exec] p2.index [exec] 1.0/ [exec] 1.0/compositeArtifacts.xml [exec] 1.0/compositeContent.xml [exec] 1.0/p2.index [exec] 1.0/1.0.0.v20150121-1828/ [exec] 1.0/1.0.0.v20150121-1828/artifacts.jar [exec] 1.0/1.0.0.v20150121-1828/content.jar [exec] 1.0/1.0.0.v20150121-1828/features/ [exec] 1.0/1.0.0.v20150121-1828/features/p2composite.example.feature.source_1.0.0.v20150121-1828.jar [exec] 1.0/1.0.0.v20150121-1828/features/p2composite.example.feature_1.0.0.v20150121-1828.jar [exec] 1.0/1.0.0.v20150121-1828/plugins/ [exec] 1.0/1.0.0.v20150121-1828/plugins/p2composite.example.plugin.source_1.0.0.v20150121-1828.jar [exec] 1.0/1.0.0.v20150121-1828/plugins/p2composite.example.plugin_1.0.0.v20150121-1828.jar [exec] [exec] sent 13,086 bytes received 271 bytes 1,406.00 bytes/sec [exec] total size is 17,310 speedup is 1.30 [INFO] Executed tasks |
Let’s have a look at the remote directory, it will contain the create p2 composite site

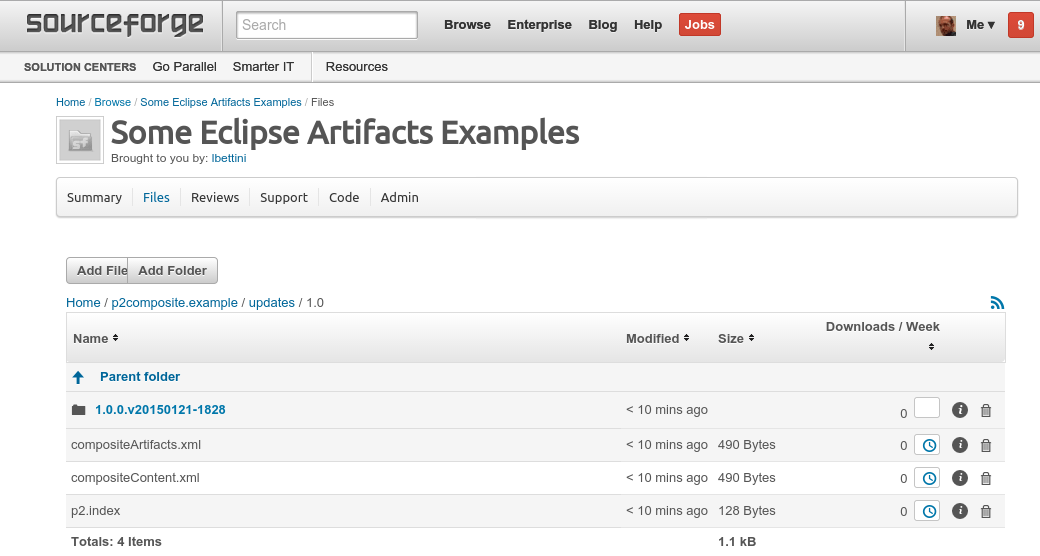
Let’s perform another release; Our local copy is up-to-date so we won’t receive anything during the update phase, but then we’ll commit another release
|
1 2 3 4 5 6 7 8 9 10 11 12 13 14 15 16 17 18 19 20 21 22 23 24 25 26 27 28 29 30 31 32 33 34 35 36 37 38 39 40 41 42 43 44 45 46 47 48 49 50 51 52 53 54 55 56 57 58 59 60 61 62 63 64 65 66 67 68 69 70 71 72 73 74 75 76 77 78 79 80 81 82 83 84 85 86 87 88 89 90 91 92 93 94 95 96 97 98 99 100 101 102 103 104 |
[INFO] --- maven-antrun-plugin:1.7:run (update-local-repository) @ p2composite.example.site --- [INFO] Executing tasks main: rsync-update: [echo] Rsync source: [echo] lbettini,eclipseexamples@frs.sourceforge.net:/home/frs/project/eclipseexamples/p2composite.example/updates/ [echo] Rsync destination: [echo] /home/bettini/p2.repositories/updates/ [exec] receiving incremental file list [exec] [exec] sent 32 bytes received 720 bytes 88.47 bytes/sec [exec] total size is 17,310 speedup is 23.02 [INFO] Executed tasks [INFO] [INFO] --- target-platform-configuration:0.22.0:target-platform (default-target-platform) @ p2composite.example.site --- [INFO] [INFO] --- tycho-p2-publisher-plugin:0.22.0:publish-products (default-publish-products) @ p2composite.example.site --- [INFO] [INFO] --- tycho-p2-publisher-plugin:0.22.0:publish-categories (default-publish-categories) @ p2composite.example.site --- [INFO] [INFO] --- tycho-p2-publisher-plugin:0.22.0:attach-artifacts (default-attach-artifacts) @ p2composite.example.site --- [INFO] [INFO] --- tycho-p2-repository-plugin:0.22.0:assemble-repository (default-assemble-repository) @ p2composite.example.site --- [INFO] [INFO] --- tycho-p2-repository-plugin:0.22.0:archive-repository (default-archive-repository) @ p2composite.example.site --- [INFO] Building zip: /home/bettini/work/eclipse/p2composite/p2composite-example/p2composite.example.site/target/p2composite.example.site-1.0.0-SNAPSHOT.zip [INFO] [INFO] --- tycho-source-feature-plugin:0.22.0:source-feature (source-feature) @ p2composite.example.site --- [INFO] [INFO] --- tycho-p2-plugin:0.22.0:p2-metadata (attach-p2-metadata) @ p2composite.example.site --- [INFO] [INFO] --- maven-antrun-plugin:1.7:run (copy-to-root-target) @ p2composite.example.site --- [INFO] Executing tasks main: [echo] [echo] Repository path: /home/bettini/work/eclipse/p2composite/p2composite-example/p2composite.example.site/target/repository [echo] Built version: 1.0.0.v20150121-1832 [echo] [copy] Copying 6 files to /home/bettini/work/eclipse/p2composite/p2composite-example/target/repository [INFO] Executed tasks [INFO] [INFO] --- tycho-eclipserun-plugin:0.22.0:eclipse-run (add-p2-composite-repository) @ p2composite.example.site --- [INFO] Expected eclipse log file: /home/bettini/work/eclipse/p2composite/p2composite-example/p2composite.example.site/target/eclipserun-work/data/.metadata/.log [INFO] Command line: [/usr/lib/jvm/java-7-oracle/jre/bin/java, -jar, /media/app/.m2/repository/p2/osgi/bundle/org.eclipse.equinox.launcher/1.3.0.v20140415-2008/org.eclipse.equinox.launcher-1.3.0.v20140415-2008.jar, -install, /home/bettini/work/eclipse/p2composite/p2composite-example/p2composite.example.site/target/eclipserun-work, -configuration, /home/bettini/work/eclipse/p2composite/p2composite-example/p2composite.example.site/target/eclipserun-work/configuration, -application, org.eclipse.ant.core.antRunner, -buildfile, packaging-p2composite.ant, p2.composite.add, -Dsite.label=Composite Site Example, -Dproject.build.directory=/home/bettini/work/eclipse/p2composite/p2composite-example/p2composite.example.site/target, -DunqualifiedVersion=1.0.0, -DbuildQualifier=v20150121-1832] Buildfile: packaging-p2composite.ant getMajorMinorVersion: compute.child.repository.data: p2.composite.add: [echo] [echo] Source repository path: /home/bettini/work/eclipse/p2composite/p2composite-example/p2composite.example.site/target/repository [echo] Copying to /home/bettini/p2.repositories/updates/1.0/1.0.0.v20150121-1832/... [mkdir] Created dir: /home/bettini/p2.repositories/updates/1.0/1.0.0.v20150121-1832 [copy] Copying 6 files to /home/bettini/p2.repositories/updates/1.0/1.0.0.v20150121-1832 [echo] [echo] Composite repository : /home/bettini/p2.repositories/updates/1.0 [echo] Composite name : Composite Site Example 1.0 [echo] Adding child repository : 1.0.0.v20150121-1832 [echo] [echo] Composite repository : /home/bettini/p2.repositories/updates [echo] Composite name : Composite Site Example All Versions [echo] Adding child repository : 1.0 BUILD SUCCESSFUL BUILD SUCCESSFUL Total time: 0 seconds [INFO] [INFO] --- maven-antrun-plugin:1.7:run (deploy-repository) @ p2composite.example.site --- [INFO] Executing tasks main: rsync-commit: [echo] Rsync source: [echo] /home/bettini/p2.repositories/updates/ [echo] Rsync destination: [echo] lbettini,eclipseexamples@frs.sourceforge.net:/home/frs/project/eclipseexamples/p2composite.example/updates/ [exec] sending incremental file list [exec] ./ [exec] 1.0/ [exec] 1.0/compositeArtifacts.xml [exec] 1.0/compositeContent.xml [exec] 1.0/1.0.0.v20150121-1828/ [exec] 1.0/1.0.0.v20150121-1828/features/ [exec] 1.0/1.0.0.v20150121-1828/plugins/ [exec] 1.0/1.0.0.v20150121-1832/ [exec] 1.0/1.0.0.v20150121-1832/artifacts.jar [exec] 1.0/1.0.0.v20150121-1832/content.jar [exec] 1.0/1.0.0.v20150121-1832/features/ [exec] 1.0/1.0.0.v20150121-1832/features/p2composite.example.feature.source_1.0.0.v20150121-1832.jar [exec] 1.0/1.0.0.v20150121-1832/features/p2composite.example.feature_1.0.0.v20150121-1832.jar [exec] 1.0/1.0.0.v20150121-1832/plugins/ [exec] 1.0/1.0.0.v20150121-1832/plugins/p2composite.example.plugin.source_1.0.0.v20150121-1832.jar [exec] 1.0/1.0.0.v20150121-1832/plugins/p2composite.example.plugin_1.0.0.v20150121-1832.jar [exec] [exec] sent 12,800 bytes received 245 bytes 1,373.16 bytes/sec [exec] total size is 32,526 speedup is 2.49 [INFO] Executed tasks |
Let’s have a look at sourceforge and see the new release

Let’s remove our local copy and try to perform another release, this time the update phase will make sure our local composite repository is synchronized with the remote site (we’ll get the whole composite site we had already released), so that when we add another composite child we’ll update our local composite repository; then we’ll commit the changes to the server (again, by uploading only the modified files, i.e., the compositeArtifacts.xml and compositeContent.xml and the new directory with the new child repository:
|
1 2 3 4 5 6 7 8 9 10 11 12 13 14 15 16 17 18 19 20 21 22 23 24 25 26 27 28 29 30 31 32 33 34 35 36 37 38 39 40 41 42 43 44 45 46 47 48 49 50 51 52 53 54 55 56 57 58 59 60 61 62 63 64 65 66 67 68 69 70 71 72 73 74 75 76 77 78 79 80 81 82 83 84 85 86 87 88 89 90 91 92 93 94 95 96 97 98 99 100 101 102 103 104 105 106 107 108 109 110 111 112 113 114 115 116 117 118 119 120 121 122 123 124 125 126 127 128 129 130 131 132 133 |
[INFO] --- maven-antrun-plugin:1.7:run (update-local-repository) @ p2composite.example.site --- [INFO] Executing tasks main: rsync-update: [echo] Rsync source: [echo] lbettini,eclipseexamples@frs.sourceforge.net:/home/frs/project/eclipseexamples/p2composite.example/updates/ [echo] Rsync destination: [echo] /home/bettini/p2.repositories/updates/ [exec] receiving incremental file list [exec] ./ [exec] compositeArtifacts.xml [exec] compositeContent.xml [exec] p2.index [exec] 1.0/ [exec] 1.0/compositeArtifacts.xml [exec] 1.0/compositeContent.xml [exec] 1.0/p2.index [exec] 1.0/1.0.0.v20150121-1828/ [exec] 1.0/1.0.0.v20150121-1828/artifacts.jar [exec] 1.0/1.0.0.v20150121-1828/content.jar [exec] 1.0/1.0.0.v20150121-1828/features/ [exec] 1.0/1.0.0.v20150121-1828/features/p2composite.example.feature.source_1.0.0.v20150121-1828.jar [exec] 1.0/1.0.0.v20150121-1828/features/p2composite.example.feature_1.0.0.v20150121-1828.jar [exec] 1.0/1.0.0.v20150121-1828/plugins/ [exec] 1.0/1.0.0.v20150121-1828/plugins/p2composite.example.plugin.source_1.0.0.v20150121-1828.jar [exec] 1.0/1.0.0.v20150121-1828/plugins/p2composite.example.plugin_1.0.0.v20150121-1828.jar [exec] 1.0/1.0.0.v20150121-1832/ [exec] 1.0/1.0.0.v20150121-1832/artifacts.jar [exec] 1.0/1.0.0.v20150121-1832/content.jar [exec] 1.0/1.0.0.v20150121-1832/features/ [exec] 1.0/1.0.0.v20150121-1832/features/p2composite.example.feature.source_1.0.0.v20150121-1832.jar [exec] 1.0/1.0.0.v20150121-1832/features/p2composite.example.feature_1.0.0.v20150121-1832.jar [exec] 1.0/1.0.0.v20150121-1832/plugins/ [exec] 1.0/1.0.0.v20150121-1832/plugins/p2composite.example.plugin.source_1.0.0.v20150121-1832.jar [exec] 1.0/1.0.0.v20150121-1832/plugins/p2composite.example.plugin_1.0.0.v20150121-1832.jar [exec] [exec] sent 417 bytes received 24,162 bytes 2,891.65 bytes/sec [exec] total size is 32,526 speedup is 1.32 [INFO] Executed tasks [INFO] [INFO] --- target-platform-configuration:0.22.0:target-platform (default-target-platform) @ p2composite.example.site --- [INFO] [INFO] --- tycho-p2-publisher-plugin:0.22.0:publish-products (default-publish-products) @ p2composite.example.site --- [INFO] [INFO] --- tycho-p2-publisher-plugin:0.22.0:publish-categories (default-publish-categories) @ p2composite.example.site --- [INFO] [INFO] --- tycho-p2-publisher-plugin:0.22.0:attach-artifacts (default-attach-artifacts) @ p2composite.example.site --- [INFO] [INFO] --- tycho-p2-repository-plugin:0.22.0:assemble-repository (default-assemble-repository) @ p2composite.example.site --- [INFO] [INFO] --- tycho-p2-repository-plugin:0.22.0:archive-repository (default-archive-repository) @ p2composite.example.site --- [INFO] Building zip: /home/bettini/work/eclipse/p2composite/p2composite-example/p2composite.example.site/target/p2composite.example.site-1.0.0-SNAPSHOT.zip [INFO] [INFO] --- tycho-source-feature-plugin:0.22.0:source-feature (source-feature) @ p2composite.example.site --- [INFO] [INFO] --- tycho-p2-plugin:0.22.0:p2-metadata (attach-p2-metadata) @ p2composite.example.site --- [INFO] [INFO] --- maven-antrun-plugin:1.7:run (copy-to-root-target) @ p2composite.example.site --- [INFO] Executing tasks main: [echo] [echo] Repository path: /home/bettini/work/eclipse/p2composite/p2composite-example/p2composite.example.site/target/repository [echo] Built version: 1.0.0.v20150121-1837 [echo] [copy] Copying 6 files to /home/bettini/work/eclipse/p2composite/p2composite-example/target/repository [INFO] Executed tasks [INFO] [INFO] --- tycho-eclipserun-plugin:0.22.0:eclipse-run (add-p2-composite-repository) @ p2composite.example.site --- [INFO] Expected eclipse log file: /home/bettini/work/eclipse/p2composite/p2composite-example/p2composite.example.site/target/eclipserun-work/data/.metadata/.log [INFO] Command line: [/usr/lib/jvm/java-7-oracle/jre/bin/java, -jar, /media/app/.m2/repository/p2/osgi/bundle/org.eclipse.equinox.launcher/1.3.0.v20140415-2008/org.eclipse.equinox.launcher-1.3.0.v20140415-2008.jar, -install, /home/bettini/work/eclipse/p2composite/p2composite-example/p2composite.example.site/target/eclipserun-work, -configuration, /home/bettini/work/eclipse/p2composite/p2composite-example/p2composite.example.site/target/eclipserun-work/configuration, -application, org.eclipse.ant.core.antRunner, -buildfile, packaging-p2composite.ant, p2.composite.add, -Dsite.label=Composite Site Example, -Dproject.build.directory=/home/bettini/work/eclipse/p2composite/p2composite-example/p2composite.example.site/target, -DunqualifiedVersion=1.0.0, -DbuildQualifier=v20150121-1837] Buildfile: packaging-p2composite.ant getMajorMinorVersion: compute.child.repository.data: p2.composite.add: [echo] [echo] Source repository path: /home/bettini/work/eclipse/p2composite/p2composite-example/p2composite.example.site/target/repository [echo] Copying to /home/bettini/p2.repositories/updates/1.0/1.0.0.v20150121-1837/... [mkdir] Created dir: /home/bettini/p2.repositories/updates/1.0/1.0.0.v20150121-1837 [copy] Copying 6 files to /home/bettini/p2.repositories/updates/1.0/1.0.0.v20150121-1837 [echo] [echo] Composite repository : /home/bettini/p2.repositories/updates/1.0 [echo] Composite name : Composite Site Example 1.0 [echo] Adding child repository : 1.0.0.v20150121-1837 [echo] [echo] Composite repository : /home/bettini/p2.repositories/updates [echo] Composite name : Composite Site Example All Versions [echo] Adding child repository : 1.0 BUILD SUCCESSFUL BUILD SUCCESSFUL Total time: 1 second [INFO] [INFO] --- maven-antrun-plugin:1.7:run (deploy-repository) @ p2composite.example.site --- [INFO] Executing tasks main: rsync-commit: [echo] Rsync source: [echo] /home/bettini/p2.repositories/updates/ [echo] Rsync destination: [echo] lbettini,eclipseexamples@frs.sourceforge.net:/home/frs/project/eclipseexamples/p2composite.example/updates/ [exec] sending incremental file list [exec] ./ [exec] 1.0/ [exec] 1.0/compositeArtifacts.xml [exec] 1.0/compositeContent.xml [exec] 1.0/1.0.0.v20150121-1828/ [exec] 1.0/1.0.0.v20150121-1828/features/ [exec] 1.0/1.0.0.v20150121-1828/plugins/ [exec] 1.0/1.0.0.v20150121-1832/ [exec] 1.0/1.0.0.v20150121-1832/features/ [exec] 1.0/1.0.0.v20150121-1832/plugins/ [exec] 1.0/1.0.0.v20150121-1837/ [exec] 1.0/1.0.0.v20150121-1837/artifacts.jar [exec] 1.0/1.0.0.v20150121-1837/content.jar [exec] 1.0/1.0.0.v20150121-1837/features/ [exec] 1.0/1.0.0.v20150121-1837/features/p2composite.example.feature.source_1.0.0.v20150121-1837.jar [exec] 1.0/1.0.0.v20150121-1837/features/p2composite.example.feature_1.0.0.v20150121-1837.jar [exec] 1.0/1.0.0.v20150121-1837/plugins/ [exec] 1.0/1.0.0.v20150121-1837/plugins/p2composite.example.plugin.source_1.0.0.v20150121-1837.jar [exec] 1.0/1.0.0.v20150121-1837/plugins/p2composite.example.plugin_1.0.0.v20150121-1837.jar [exec] [exec] sent 13,217 bytes received 275 bytes 1,420.21 bytes/sec [exec] total size is 47,739 speedup is 3.54 [INFO] Executed tasks |
Again, the remote site is correctly updated

Providing the URL of your p2 repository
Now that you have your p2 repository on sourceforge, you only need to give your users the URL to use for installing your features in Eclipse.
You have two forms for the URL
- This will use the mirror infrastructure of sourceforge: http://sourceforge.net/projects/<project>/files/<path>
- This will bypass mirrors: http://master.dl.sourceforge.net/project/<project>/<path>
If you use the mirror form, when installing in Eclipse (or provisioning a target platform) you’ll see warnings on the console of the shape
|
1 2 3 4 5 |
WARNING: Invalid cookie header: "Set-Cookie: VISITOR=54c382b9c3d3bc3420ac8ac2; expires="Tue, 21-Jan-2025 11:32:09 GMT"; httponly; Max-Age=315360000; Path=/". Unable to parse expires attribute: "Tue, 21-Jan-2025 11:32:09 GMT" Jan 24, 2015 12:32:10 PM org.apache.http.client.protocol.ResponseProcessCookies processCookies WARNING: Invalid cookie header: "Set-Cookie: VISITOR=54c382b9c3d3bc3420ac8ac2; expires="Tue, 21-Jan-2025 11:32:08 GMT"; httponly; Max-Age=315360000; Path=/". Unable to parse expires attribute: "Tue, 21-Jan-2025 11:32:08 GMT" Jan 24, 2015 12:32:10 PM org.apache.http.client.protocol.ResponseProcessCookies processCookies WARNING: Invalid cookie header: "Set-Cookie: sf_mirror_attempt="eclipseexamples:netcologne:p2composite.example/updates/1.0/1.0.0.v20150121-1837/content.jar"; expires=120; Path=/". Unable to parse expires attribute: 120 |
But it’s safe to ignore them.
For our example the URL can be one of the following:
- With mirrors: http://sourceforge.net/projects/eclipseexamples/files/p2composite.example/updates/
- Main site: http://master.dl.sourceforge.net/project/eclipseexamples/p2composite.example/updates/
You may want to try them both in Eclipse.
Please keep in mind that you may hit some unavailability errors now and then, if sourceforge sites are down for maintenance or unreachable for any reason… but that’s not much different when you hit a bad Eclipse mirror, or the main Eclipse download site is down… I guess no hosting site is perfect anyway 😉
I hope you find this blog post useful, Happy releasing! 🙂
Pingback: Publish an Eclipse p2 composite repository on Bintray | Lorenzo Bettini